Setting up a NixOS server from an Intel NUC
Living with no more possessions than fit in a backpack & checked in luggage is easy, if all your work and media consumption lives in a laptop. That’s how I’ve lived for the last 5 years - relocating between Asia and Europe every few months.
The day has come though, when I need to have a server. I want it’s hardware so that I have full control over it.
After some looking around, the Intel NUC seems like the ultimate house server for when you can have no more than some 20kg of belongings.
In this article, I’ll show the steps to buy & assemble the computer, and getting NixOS running on it.
Step 0: Parts
Friday night I had made the decision to go with the NUC. Luckily, electronics stores is something Tokyo is not devoid of. Few stores had the NUC in stock. After a few tries I ended up going to Akihabara to buy the hardware in Tsukumo. I wanted an i5, but settled for the i3 as a few hours in Akihabara is enough for us faint of heart.

You need to buy a SSD (any of the M.2 form factor) as well as a memory, of the DDR4 form factor. I got one 16GB memory and 1TB SSD.
Step 1: Assembly
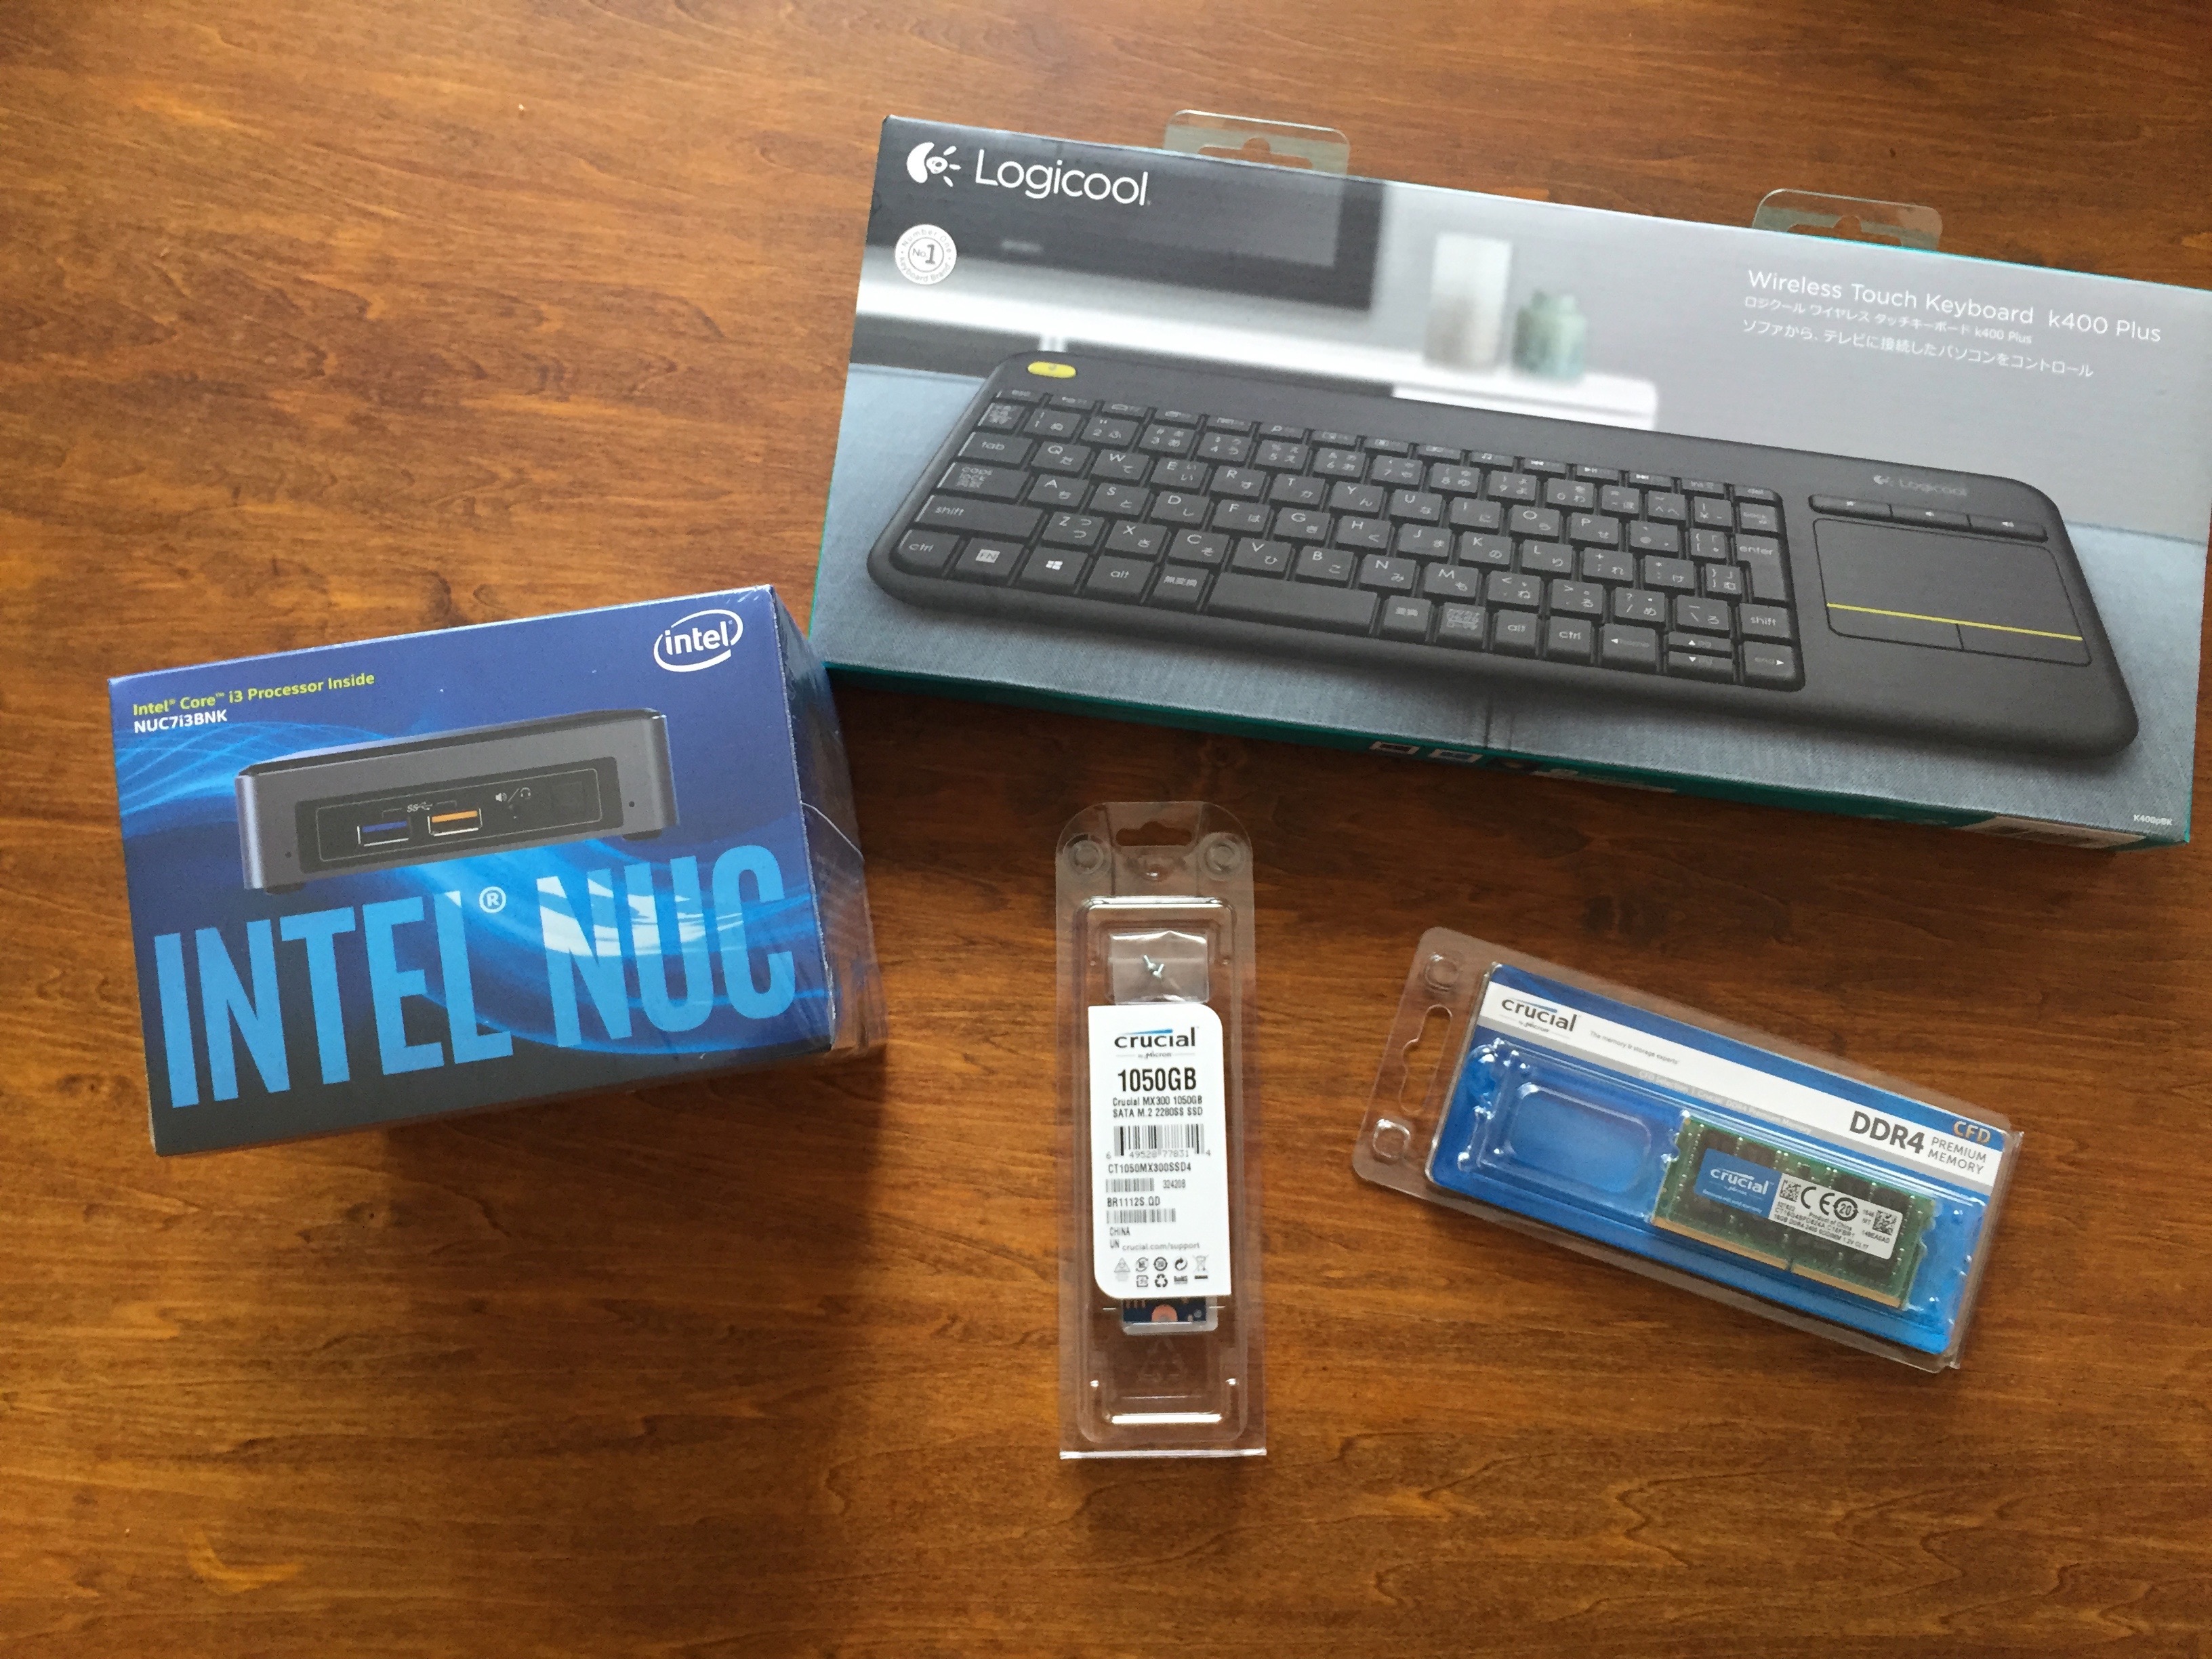
Picked out a keyboard with built in pointing device. It’s not the best keyboard, but pretty portable and wireless with a USB dongle.
Building the device is easy, just unscrew (normal cross type screws) the bottom plate, take the lid of, and snap in the components.
Step 2: Making a bootable NixOS USB stick
Downloaded the NixOS Graphical Live CD.
With the USB stick formatted at FAT and plugged in but unmounted, running $ sudo dd bs=4m if=nixos-graphical-17.03.945.5acb454e2a-x86_64-linux.iso of=/dev/disk2s1 installs the image on the memory stick. Note that the arguments to if and of will likely be different in your case. To figure out where in /dev your USB stick is, run $ mount before inserting it, and then again after, and compare the results. The new entry is your USB stick.
When using GNU dd (as on most Linuxes), replace the argument to bs with an uppercase M, so that it is $ sudo dd bs=4M if=....
Step 3: Partitioning & formatting
With the NixOS-filled USB stick plugged into the NUC, boot.
You’re greeted with a menu from the bootloader.
In the terminal, type (as instructed) # systemctl start display-manager to get a GUI. Useful if you need to set up Wi-Fi during installation, or browse the web.
Open GParted from the desktop, and select in the menu “Partition” “New”. Select gpt for partition table.
Create a 500MB partition labeled “boot”, and an ext4 partition of the rest.
Step 3.1: Encrypted file system
You should use full disk encryption. In many operating systems such as Ubuntu and MacOS it’s as easy as checking a box during setup. Here, we need to run a few commands. This sections credits are due to Martijn Vermaat.
- Set up the encrypted LUKS partition and open it for editing
# cryptsetup luksFormat /dev/sda2
# cryptsetup luksOpen /dev/sda2 enc-pv
- We create two logical volumes, an 8GB swap partition and the rest will be our root filesystem
# pvcreate /dev/mapper/enc-pv
# vgcreate vg /dev/mapper/enc-pv
# lvcreate -L 8G -n swap vg
# lvcreate -l '100%FREE' -n root vg
- Format the partitions
# mkfs.fat /dev/sda1
# mkfs.ext4 -L root /dev/vg/root
# mkswap -L swap /dev/vg/swap
Step 4: Install NixOS
You are now ready to mount and install NixOS.
# mount /dev/vg/root /mnt && mkdir /mnt/boot && mount /dev/sda1 /mnt/boot && swapon /dev/vg/swap
Generate the NixOS configuration for your setup: # nixos-generate-config --root /mnt.
After having created /mnt/etc/configuration.nix, add these three lines at line 13.
At this point I wanted to use Emacs - so in a terminal you can just # nix-shell -p emacs to create a shell with emacs available, and in the new shell just run emacs.
boot.loader.grub.enable = true;
boot.loader.grub.version = 2;
boot.loader.grub.device = "/dev/sda";
If confused by now, there is more to read in the NixOS manual.
Logitech K400 Plus drivers
Because my keyboard is a Logicool K400 Plus (aka Logitech, I assume they have a different brand in Japan) I had to add a kernel module to activate it’s drivers while in the first stage of booting (where you enter the disk encryption password).
To do this I edited the boot.initrd.availableKernelModules list (found in /etc/nixos/hardware-configuration.nix on line 11) and appended the two entries "hid_logitech_hidpp" and "hid_logitech_dj". If your input device does not work, this is likely what you must do.
Install it
The only imperative part of this has been setting up the partitions and encryption - it’s pretty cool that the rest of the system can be managed by a simple configuration file.
When things are like you want them (enable a desktop environment, set up user accounts or setting up a firewall) you are ready to run the installer.
# nixos-install && shutdown now
And you are done! Remove your USB stick, hit the power button and log in.
If something goes wrong
Remember that you when something goes wrong, you can just wipe your disk and start over. If you want to access your encrypted disk from the live-usb, follow these instructions.
Conclusions
Installing NixOS was not fun. It has been a long time since last I had to search the web for HOTWOs on how to get Linuxes running. I can’t remember when last I had to fiddle with drivers (even if NixOS makes it as easy as adding two strings to a list).
After that is done though, it’s really a great system. There is real power in functional & declarative programming, and being able to create your system from a simple and pure function definition (/etc/nixos/configuration.nix) is seriously cool. Editing that file and running # nixos-rebuild switch to “make it happen” is great. I recommend it to anyone who has the patience with the tedious and somewhat frustrating process of setting it up.